Text allows you to add captions, and information on your page.
Icon Descriptions.
Add – Adds a text box to your page.
Case – Updates case on a selected text box. (UPPER, lower, Title, Sentence.)
Curve – Curve your text around or inside a square or circle shape.
Shadow – Adds a shadow to the selected text to give it depth.
Color – Sets a desired color for the selected text.
Match – Match the color of other elements on the page.
Black – Changes the selected text color to black.
White – Changes the selected text color to white.
Mirror – Flips the text horizontally.
Flip – Flips the text vertically.
Left – Rotates the text left 90 degrees.
Right – Rotates the text right 90 degrees.
Remove – Deletes the selected text box from the page.
Edit – Enter and exit the typing mode, so that you can enter new text, or adjust the position.
Padding – Increase or decrease the distance text is placed from the edge of the box.
Border – Add a border around the selected text box.
Address – Brings up your address book contact list.
Field – Select a specific field from your address book.
Insert – Allows you to insert the selected filed into a text box.
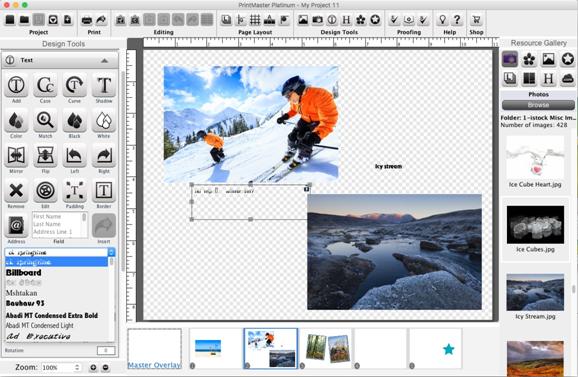
Font – Loads a drop down menu of available fonts.
Size – Set the desired size of selected text from the drop down menu.
Spacing – Adjust the space between lines. (1 – 3)
Tracking – Adjust the space between individual letters.
Horizontal Alignment – Set text justification to Left, Center, Right, or Full.
Vertical Alignment – Set text justification to Top, Middle, or Bottom.
Style – Select B (Bold), U (Underline), I (Italicize), or (Bullet) to apply the style.
25.
Opacity – Drag the slider left or right to increase or
reduce the transparency.
26.
Rotation – Drag the slider left or right to apply a
rotation.
1.
To add text, open the Text tab under design tools, and click
on the Add icon.
2.
A text box will appear in the middle of the page.
3.
Type your text in the text box.
4.
Use the options in the text panel to change size, font, or
style of highlight text.
5.
Drag from the handles (small grey boxes) on the edge of the
box to adjust its size.
6.
De-select the box, then drag from the center of the box to
adjust the position.
·
To enter edit mode (allows typing) double-click on the text
box.
·
To exit edit mode (allows positioning) de-select the box by
clicking off the page.
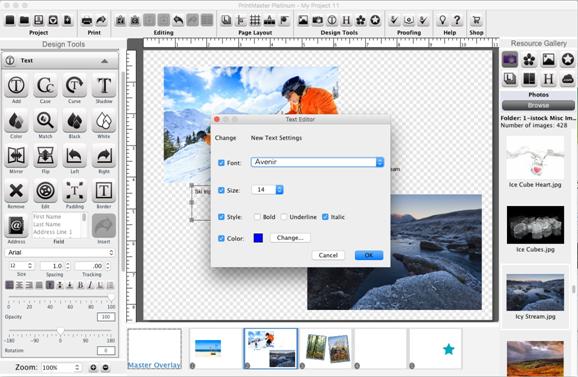
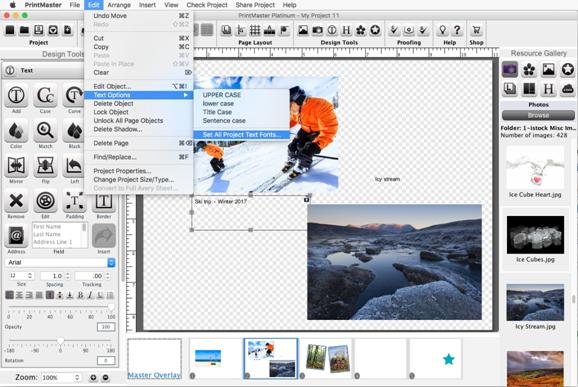
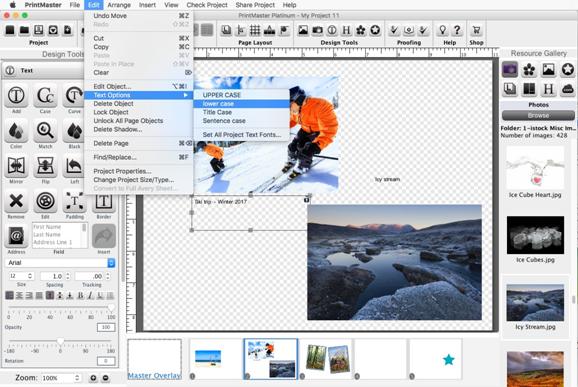
Set All Project Text Fonts - Apply fonts and styles to all text boxes in a project.
1.
Go to the Edit menu > Text Options > Set All Project
Text Fonts.
2.
In the Text Style Editor dialog select your new font, size,
style & color.
3.
Click Ok to apply the change to all text within your
project.
Text Case Tools – Change text to UPPER, lower, Sentence, or Title case.
Select
a text box, then go to the Edit menu > Text Options.
Recently Used Fonts and Type to Select Fonts
·
The font drop down menu supports 5 recent fonts that will
automatically appear at the top of the list as you apply different fonts to
Text objects.
·
You can also click the drop down and start typing the name
of the font, the menu with jump to the font with the same name, this saves time
instead of having to manually scroll large font lists.
Related Topics